So I've been working on and off trying to get the Kindle weather display to work properly between a web server and the Kindle. This morning at around 12:15 am I finally got everything working properly.
How It Works
On the web server a shell script (weather-script.sh) runs at certain intervals (via a cronjob) and triggers the following:
- step 1: python script on web server pulls latest weather data from NOAA
- step 2: python script replaces placeholder tags on the preprocess.svg with data from NOAA and saves it as weather-script-output.svg
- step 3: shell script converts the new svg file to a png file (the Kindle can only read png files, not svg)
- step 4: shell script compresses the png file to make it a smaller file size
Then on the Kindle with the display file (weather-display.sh) running:
- step 5: Kindle looks at the web server. If the png file is available, display it.
- step 6: update the display by replacing the png file at intervals defined on Kindle (via cron)
The whole thing has been a fantastic exercise. While I didn't create the graphics or write the python script (I can't code in python, but I'm certainly teaching myself because it looks fascinating), I've learned enough along the way to know how to tweak things and see a potential for changes and future projects.
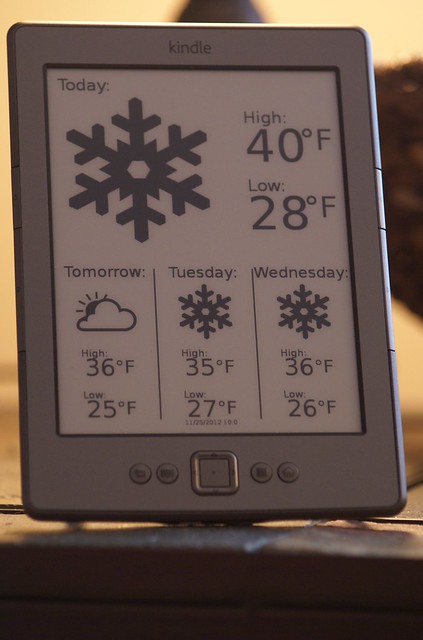
In fact, the first thing was to add a date.
The Kindle Weather Display as created by
Matthew Petroff doesn't include a date. If you trust everything you're doing and you're looking for the cleanest possible display, there'd be no reason to clutter it with a date.
I don't trust me and I wanted a date.
Chris helped me work out placement with the date since he has more experience working with
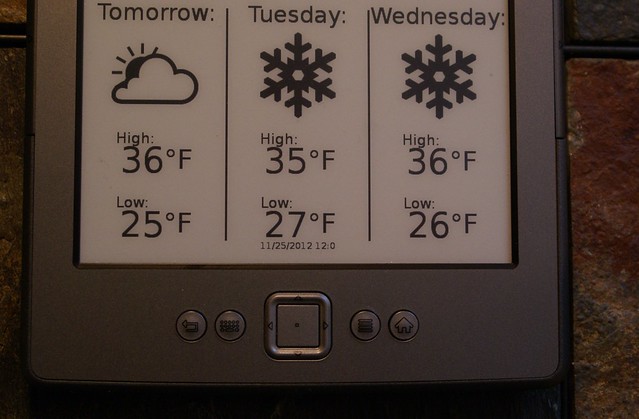
SVG files. We added a small line (called DATE_VALPLACE) in the weather-script-preprocess.svg file. This creates a place holder for date and time.
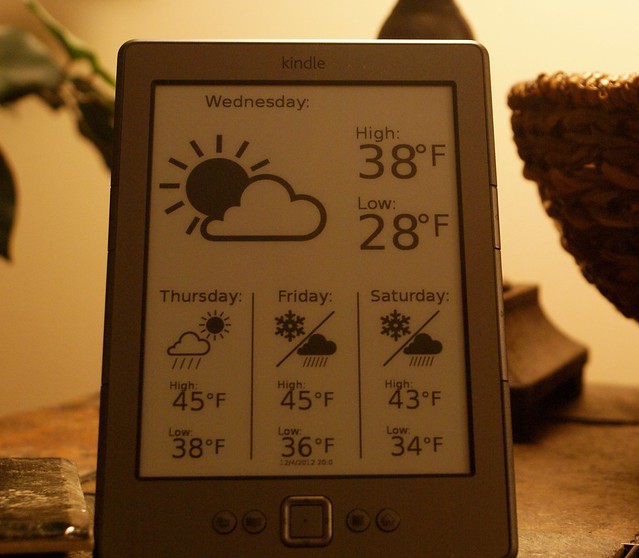
The whole thing is only 12 pixels high so it's very small, as you can see.
To accommodate the space for the date, we did shrink down the size of the high and low temperature displays on the bottom row (to 48px from 58) and move them up slightly (about 10 points on the y axis).
After that just a few lines had to be added to the python script to actually calculate the date and time.
Now we have a weather display that shows the date and time of the last update.
If this is something you're interested in setting up, I'd recommend reading the original
Kindle Weather Display blogpost and downloading the files Matthew Petroff has available.
Because I didn't already have a web server running I used this as an exercise to learn more about both Linux web servers and general Kindle hacking. I've listed the steps I took below. Here are the modified files on
github or if, if you prefer,
dropbox. These are what I'm using to run the display with date and time on my Raspberry Pi server.
Before Beginning You Must Have
- A Kindle (examples below are for Kindle 4 with software version 4.1.0)
- Jailbreak
- Ability to SSH into the Kindle (this is how I set up USBNetworking)
- Access to a Linux server (this may work on OS X or Windows with some modifications to the shell scripts)
I'd also recommend knowledge working in the linux command line and working with vi editor.
Installing Kite on Kindle 4
Kite is an application launcher that allows you to launch apps from the Kindle home screen. This is what will be used to launch the weather display on the Kindle.
NOTE: once this is running, you cannot exit it. The Kindle will need to be rebooted to get back into the menu. To reboot the kindle hold the power button for 20 seconds.
- Grab Kite
- There have been posts about people unable to install from the update .bin file on the Kindle 4 so I used "installation of kite as script" which was the kite.gz download.
- Plug the Kindle into your PC and drop kite.gz onto the Kindle
- unmount and SSH into the Kindle
- mount the Kindle file system
- move into /mnt/us
- Unzip the kite.gz file
- Kite should now be installed. When you restart your kindle you will see a kite pdf (delete me). Simply delete the file.
- Next is to add files to the kite folder. Plug the Kindle into your PC and create a folder called kite (you may need to move a file called kite into another folder first)
- Create a folder called ondrop within the kite folder.
- Drop the relevant files into kite/ondrop
- Reboot kindle, select "Kite" from the menu to launch the file in the kite/ondrop folder
Setting the Clock on the Kindle
If you have not registered the Kindle with Amazon, it will probably not be displaying the correct date. Ensuring that the clock is right (or that you are at least aware of the time on the Kindle) is crucial to scheduling cron jobs. Here’s how to change the time on the Kindle if you haven’t registered it with Amazon and downloaded the correct time. This is taken from this blogpost.
- SSH into the Kindle
- example: date 112316102012 (this will set the Kindle to November 23 2012, 4:10pm
- Permanently store the time on the Kindle
Editing cron on the Kindle
The Kindle does not allow for custom jobs to be created as is typically done in linux. The file system needed is temporary and removed after a reboot. All cron scheduling MUST be done in the root cron file under: /etc/crontab/root
If you're unfamiliar with cron, I recommend starting with here first.
- SSH into Kindle and mount the file system
- Edit CRON file in vi (http://en.wikipedia.org/wiki/Vi)
- type: vi /etc/crontab/root
- A list of jobs in the root cron file should appear
*/60 * * * * /usr/sbin/loginfo tmpfs
*/60 * * * * /usr/sbin/loginfo localVars
*/60 * * * * /usr/sbin/loginfo memusedump
*/15 * * * * /usr/sbin/loginfo powerdcheck
*/5 * * * * /mnt/us/weather/display-weather.sh
Your cron file will look like the above, minus the line highlighted in yellow. Simply add a line to run your script as often as you would like. In this example the display-weather.sh file is scheduled to run every 5 minutes. I used this interval for testing purposes to ensure the server and kindle were working properly and updating.
NOTE: I DO NOT RECOMMENDED SETTING THIS TO A LOWER INTERVAL FOR TESTING PURPOSES. As soon as you restart cron (either rebooting the Kindle or from the command line) The display launches at the designated time. If you set this too low (for example 1 or 2 minutes) and reboot the kindle, you will be unable to access the cron and adjust the time. This is because a reboot causes you to lose access to SSH (requiring the ;debug command to be re-entered). If the script is set to run every minute or 2 minutes, that is likely not enough time for you to enter the command, SSH into the device, and edit cron.
Now, my web server is set to pull the weather every 2 hours so I set the cron on the Kindle to update ever 2 hours at the 5 minute mark. That means the Kindle will now look for an update at 2:05, 4:05, 6:05, etc. That is a full 5 minutes after the server has pulled the weather and processed the data.
Here is the line I added:
5 */2 * * * /mnt/us/weather/display-weather.sh
- reboot cron
- type: /etc/init.d/cron restart
- cron restart will look like this:
- system: I cron:def:stopping crond
- system: I cron:def:starting crond
- the script will now run at the designated time. You can launch it manually from Kite on the home screen or wait for the interval to pass in cron and it will launch it automatically.
Notes For Setting Up Your Linux Web Server
- You must have Python installed (version 2.7.3 will work. I have not tested the script in Python3).
- You will need rsvg-convert or imagemagick to convert the SVG file to PNG (the Kindle cannot read SVG files).
- You need pngcrush installed to compress the PNG file. If you use the file as provided on the Kindle Weather Display website, you will need version 1.7.22. Pngcrush should be available in your distro repository.
NOTE: Ubuntu doesn't support the latest version and I couldn't get it to install properly from the command line so I used pngcrush 1.7.0 and modified the shell script to get the properly formatted file. Here is how I modified it:
#!/bin/sh
cd "$(dirname "$0")"
python2 weather-script.py
rsvg-convert --background-color=white -o weather-script-output-new.png weather-script-output.svgpngcrush -c 0 -nofilecheck weather-script-output-new.png weather-script-output.pngcp -f weather-script-output.png /path/to/web/server/directory/weather-script-output-new.png
Raspberry Pi Special Note:
If you're setting this up on a Raspberry Pi running Raspbian, as I have, there are a few extra notes to be aware of.
- Used imagemagick instead of rsvg-convert (I could not find the library for rsvg-convert available on Raspbian)
- Had to use pngcrush version 1.7.9
- Had to ensure full paths are included in the custom cronjob because it wouldn't run the weather-script.sh file properly.
PATH=/usr/local/sbin:/usr/local/bin:/sbin:/bin:/usr/sbin:/usr/bin#
m h dom mon dow command
* * * * * /YOUR/WEBSERVER/FILEPATH/HERE/weather-script.sh
- Had to set weather-script.sh file as executable (chmod 755 weather-script.sh)
- OR add your user (default: pi) to the crontab group in /etc/group (type nano /etc/group)
- Had to correct the Python name in the shell script from python 2 to python2.7:
#!/bin/sh
cd "$(dirname "$0")"
python2.7 weather-script.py
convert weather-script-output.svg weather-script-output-new.png
pngcrush -c 0 nofilecheck weather-script-output-new weather-script-output.png
cp -f weather-script-output.png /path/to/web/server/directory/weather-script-output-new.png
I've enjoyed this project quite a bit and I'm already thinking about changes and modifications to the project. Some of them are:
- Modify the display to post the current temperature OR just the low temperature after the sun sets
- Write a script to display news and information based on RSS feeds
- Modify the files so that they will work on the Kindle as a stand alone without the web server. Similar to the Kobo Weather Display.





 Posts
Posts


