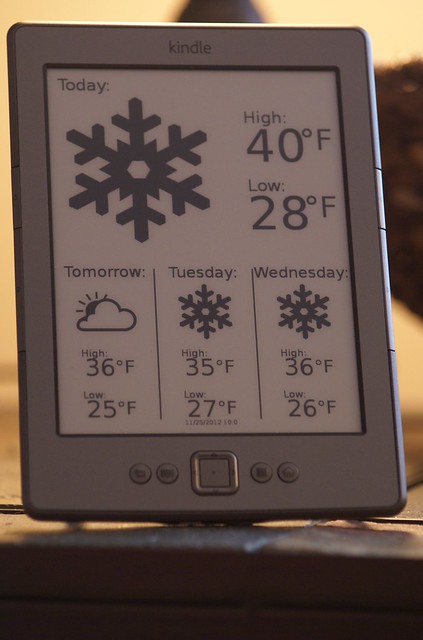
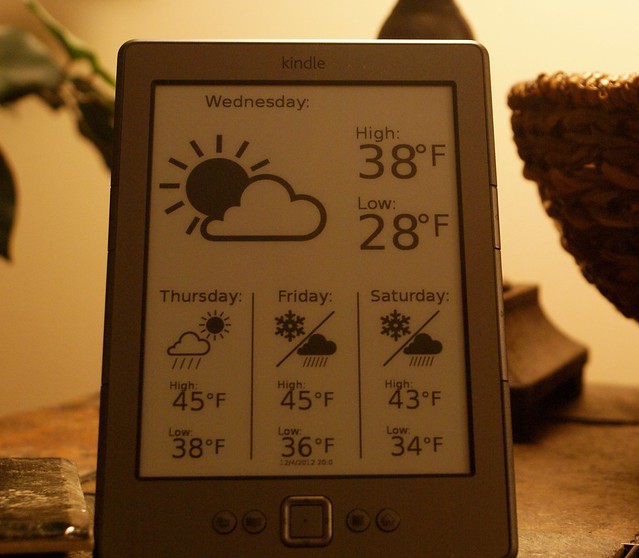
Today
Tomorrow
next day (day of the week)
day after that (day of the week)
This works wonderfully until you hit about 7pm. At 7pm the forecast flips from giving you the current day's forecast to the next day's forecast. This is because the information from NOAA being pulled is based on UTC and not a local time zone. So to eliminate any confusion in the evening, I thought it would be nice to add the name of the day of the week for the Today and Tomorrow forecasts.

one_day = datetime.timedelta(days=1)
days_of_week = ['Monday', 'Tuesday', 'Wednesday', 'Thursday', 'Friday', 'Saturday', 'Sunday']
output = output.replace('DAY_ONE',days_of_week[(day_one + 0*one_day).weekday()]).replace('DAY_TWO',days_of_week[(day_one + 1*one_day).weekday()]).replace('DAY_THREE',days_of_week[(day_one + 2*one_day).weekday()]).replace('DAY_FOUR',days_of_week[(day_one + 3*one_day).weekday()])
I'm not 100% sure that's the most efficient way to do it, but it works.

I also noticed the DAY_ONE day was being cut off when the actual day of the week was being inserted so I had to play around a bit with the x axis placement. I also opted for a left anchor as well which pulled the day over a little. I might play around and move it some more if it bothers me, but for now I'm happy with the placement.
Original post with tutorial:Kindle Weather Display
File downloads:
Kindle Weather Display Github Repository
Or if you prefer, download directly from dropbox


7 comments:
Awesome work. Since the "today" text can be variable in length, and I don't necessarily care where it ends (as much as where it begins), I just made the svg treat that as a start anchor. Here's the edited line of svg:
DAY_ONE:
Oops. It ate the markup. Try this?
>text style="text-anchor:start;" font-size="35px" y="52.256058" x="15"%lt;DAY_ONE:>/text<
Gah. I totally mangled that. Here's the actual line:
<text style="text-anchor:start;" font-size="35px" y="52.256058" x="15">DAY_ONE:</text>
Sorry for the spam!
Cool. Thanks! And no worries - certainly not spam. :)
did you ever make it show current weather. I am modifying this to be used in a rasberry pi based picture frame and can not figure out how to get the current conditions
@gabetz08
If you want to have this show current temperatures, you'll have to pull that information from NOAA instead of what the python script is currently doing - which is pulling the high and low temps for a 5 day forecast. This NOAA page should help get you to where you need to be: http://w1.weather.gov/xml/current_obs/
Next you'd probably have to increase the refresh rate of the script. I have the example set to 2 hours. If you want this to show you current temperatures, you'd have to decide at what interval you want the pi to re-run the script.
Lastly, if you're only showing the current temperature and not a forecast, you'd need to rearrange the SVG file so that it's formatted better to the information you need.
Thanks for the reply, I thought that might be the case and I got it working. Increased the picture size, now it shows current and future. just need to add the buttons to my picture frame now
Post a Comment