We assembled the OctoCam today. It's nice to finally have a Raspberry Pi Zero W. The few we have don't have wifi so it's nice to have such a tiny board with wifi on it.

With new cables in hand I was able to hook up the camera module to the Raspberry Pi Zero. Now to configure everything!

While at my parents house, Chris and I stepped out to shop at Micro Center. I wanted a Raspberry Pi Zero and for $5 it's hard to come by so I was pretty excited they had it in stock.

I have a few project ideas but nothing firm yet. For now it's just fun to play with a computer the size of a stick of gum.

I've been working on and off the last few days on getting a button set up to turn on and off a GE Link light connected to the Philips Hue bridge.

The reason why is to preserve the dim setting on the light bulb. When you turn on the light with the switch on the lamp, it turns the light on full brightness. That's perfect for some situations, but when I get up to nurse and change a diaper, I want to keep the room as dim as possible to keep the baby as asleep (or sleepy). Typically we have the lamp set on the lowest setting. Unfortunately that isn't something that can be controlled with the physical switch on the lamp.

I have been leaving the light on most of the night, but I want the baby to get used to sleeping in darkness. That is why I wanted to get a remote switch (or button) set up to turn on and off the lamp at the dimmest setting.

Initially I wanted to use the Hue Tap, which is a remote switch we already have. However non-Hue light bulbs are not compatible with the Tap. That meant finding an alternate way to remotely turn on and off the light. (I didn't want to go out and buy a dimmable light bulb when a more fun, albeit complicated, solution presented itself.)

So I opted to create a python script to run on the Raspberry Pi.
I knew I had all of the components, which was great. I didn't really want to buy anything since I have plenty of miscellaneous switches and buttons for arduino projects. My only real issue is that the plastic connectors on the wire are a bit too high when plugged into the GPIO pins on the Raspberry Pi. Which means I can't quite close the case.

I'm going to have to get a dremmel or a knife to cut down the plastic a bit to close the case. But that's a project for tomorrow or the next day. I also have a larger button I think I am going to wire up to make it easy to push at 3am in the morning.

If you are interested, I have the files and a brief description up on github.
https://github.com/shatteredhaven/ControllingHueLightsWithPushButton

I spent part of the day (and yesterday) off and on working on a python script to run on the Raspberry Pi to remotely turn on and off a light in the baby room. I originally wanted to use an arduino, but I couldn't find an easy way to have it interface with python via wifi. So I opted for the Raspberry Pi instead.

Earlier this week the python scripts on the Raspberry Pi linux server stopped working properly with the Philips Hue lights I set up a few years ago. So I logged into the little Pi that sits on my desk and did some minor tweaking so the two scripts that run in the morning - Sunrise Lamp and Weather Lamp - started to work again. Mostly it just involved downloading the latest phue library (python library for the Philips Hue) onto the Pi.

It was an easy fix, but it's been so long since I've actually had to do anything with the lights, that I forgot how fun it is!

Awhile back a camera module came out for the Raspberry Pi. So this evening I set up the camera, which is housed in a nice little case Chris printed on the 3D printer.

Setup was pretty easy. The instructions on the Raspberry Pi page are simple. So after a quick software upgrade I was up and running.

As you can see, the video quality isn't bad for a tiny, cheap camera.
Video streaming from the Raspberry Pi to my Windows desktop was a breeze. I used the sleeping cat as a test subject again.
And the quality of the still image captures is pretty decent as well.

All in all I'm pretty impressed!

I've had two items from Adafruit hanging around for awhile waiting to be soldered. One of them is the Pi Cobbler, which is essentially a break out board that lets me use the general input/output pins on the Raspberry Pi. That allows me to hook up all sorts of things, like a temperature sensor.

I practiced soldering a little on a soldering kit I had then moved onto the actual components. Despite having a fan going and the window open, it was still a little strong smelling. As you can see I tried to mitigate that with a painters mask, but of course that didn't do much.

Soon the component was assembled and I hooked it up to the Raspberry Pi to test.
As you can see, everything worked and I was able to get a temperature reading from a sensor I wired to the Pi Cobbler. Success!
The next item I had to solder was an Arduino Motor Shield. This little thing will allow me to construct a small robot. There were a lot more components for this project.
And thanks to a magnifying glass and some patience...
The whole thing was assembled in no time!

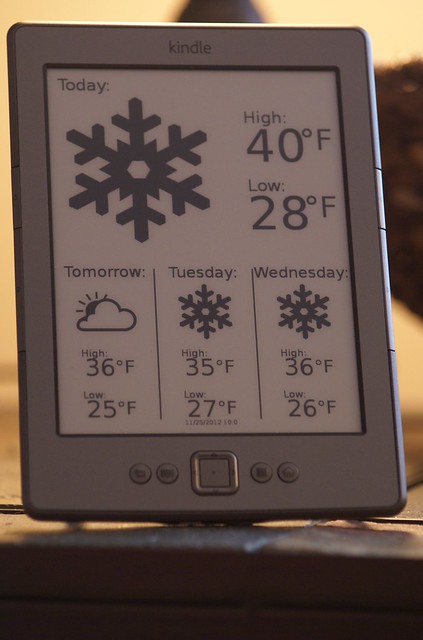
So I've been working on and off trying to get the Kindle weather display to work properly between a web server and the Kindle. This morning at around 12:15 am I finally got everything working properly.

How It Works
On the web server a shell script (weather-script.sh) runs at certain intervals (via a cronjob) and triggers the following:
  • step 1: python script on web server pulls latest weather data from NOAA
  • step 2: python script replaces placeholder tags on the preprocess.svg with data from NOAA and saves it as weather-script-output.svg
  • step 3: shell script converts the new svg file to a png file (the Kindle can only read png files, not svg)
  • step 4: shell script compresses the png file to make it a smaller file size
Then on the Kindle with the display file (weather-display.sh) running:

  • step 5: Kindle looks at the web server. If the png file is available, display it.
  • step 6: update the display by replacing the png file at intervals defined on Kindle (via cron)

The whole thing has been a fantastic exercise. While I didn't create the graphics or write the python script (I can't code in python, but I'm certainly teaching myself because it looks fascinating), I've learned enough along the way to know how to tweak things and see a potential for changes and future projects.

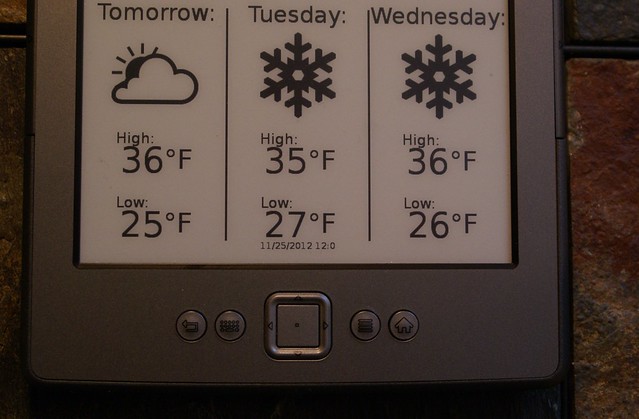
In fact, the first thing was to add a date. The Kindle Weather Display as created by Matthew Petroff doesn't include a date. If you trust everything you're doing and you're looking for the cleanest possible display, there'd be no reason to clutter it with a date.

I don't trust me and I wanted a date.
Chris helped me work out placement with the date since he has more experience working with SVG files. We added a small line (called DATE_VALPLACE) in the weather-script-preprocess.svg file. This creates a place holder for date and time.
The whole thing is only 12 pixels high so it's very small, as you can see.

To accommodate the space for the date, we did shrink down the size of the high and low temperature displays on the bottom row (to 48px from 58) and move them up slightly (about 10 points on the y axis).

After that just a few lines had to be added to the python script to actually calculate the date and time.
Now we have a weather display that shows the date and time of the last update.

If this is something you're interested in setting up, I'd recommend reading the original Kindle Weather Display blogpost and downloading the files Matthew Petroff has available.
Because I didn't already have a web server running I used this as an exercise to learn more about both Linux web servers and general Kindle hacking. I've listed the steps I took below. Here are the modified files on github or if, if you prefer, dropbox. These are what I'm using to run the display with date and time on my Raspberry Pi server.

Before Beginning You Must Have
  1. A Kindle (examples below are for Kindle 4 with software version 4.1.0)
  2. Jailbreak
  3. Ability to SSH into the Kindle (this is how I set up USBNetworking)
  4. Access to a Linux server (this may work on OS X or Windows with some modifications to the shell scripts)

I'd also recommend knowledge working in the linux command line and working with vi editor.


Installing Kite on Kindle 4
Kite is an application launcher that allows you to launch apps from the Kindle home screen. This is what will be used to launch the weather display on the Kindle.

NOTE: once this is running, you cannot exit it. The Kindle will need to be rebooted to get back into the menu. To reboot the kindle hold the power button for 20 seconds. 
  1. Grab Kite  
    • There have been posts about people unable to install from the update .bin file on the Kindle 4 so I used "installation of kite as script" which was the kite.gz download.
  2. Plug the Kindle into your PC and drop kite.gz onto the Kindle
  3. unmount and SSH into the Kindle
  4. mount the Kindle file system 
    • type: mntroot rw
  5. move into /mnt/us 
    • type: cd /mnt/us
  6. Unzip the kite.gz file
    • type:
      • gzip -d kite.gz
      • sh kite
  7. Kite should now be installed. When you restart your kindle you will see a kite pdf (delete me). Simply delete the file.
  8. Next is to add files to the kite folder. Plug the Kindle into your PC and create a folder called kite (you may need to move a file called kite into another folder first)
  9. Create a folder called ondrop within the kite folder.
  10. Drop the relevant files into kite/ondrop
  11. Reboot kindle, select "Kite" from the menu to launch the file in the kite/ondrop folder
Setting the Clock on the Kindle
If you have not registered the Kindle with Amazon, it will probably not be displaying the correct date. Ensuring that the clock is right (or that you are at least aware of the time on the Kindle) is crucial to scheduling cron jobs. Here’s how to change the time on the Kindle if you haven’t registered it with Amazon and downloaded the correct time. This is taken from this blogpost.
  1. SSH into the Kindle
    • type: date MMDDHHMMYYYY
      • example: date 112316102012 (this will set the Kindle to November 23 2012, 4:10pm
  2. Permanently store the time on the Kindle
    • type: hwclock -w
Editing cron on the Kindle
The Kindle does not allow for custom jobs to be created as is typically done in linux. The file system needed is temporary and removed after a reboot. All cron scheduling MUST be done in the root cron file under: /etc/crontab/root

If you're unfamiliar with cron, I recommend starting with here first.
  • SSH into Kindle and mount the file system
    • type: mntroot rw
  • Edit CRON file in vi (http://en.wikipedia.org/wiki/Vi) 
    • type: vi /etc/crontab/root
  • A list of jobs in the root cron file should appear 
*/60 * * * * /usr/sbin/loginfo tmpfs
*/60 * * * * /usr/sbin/loginfo localVars
*/60 * * * * /usr/sbin/loginfo memusedump
*/15 * * * * /usr/sbin/loginfo powerdcheck
*/5  * * * * /mnt/us/weather/display-weather.sh

Your cron file will look like the above, minus the line highlighted in yellow. Simply add a line to run your script as often as you would like. In this example the display-weather.sh file is scheduled to run every 5 minutes. I used this interval for testing purposes to ensure the server and kindle were working properly and updating.

NOTE: I DO NOT RECOMMENDED SETTING THIS TO A LOWER INTERVAL FOR TESTING PURPOSES. As soon as you restart cron (either rebooting the Kindle or from the command line) The display launches at the designated time. If you set this too low (for example 1 or 2 minutes) and reboot the kindle, you will be unable to access the cron and adjust the time. This is because a reboot causes you to lose access to SSH (requiring the ;debug command to be re-entered). If the script is set to run every minute or 2 minutes, that is likely not enough time for you to enter the command, SSH into the device, and edit cron.  

Now, my web server is set to pull the weather every 2 hours so I set the cron on the Kindle to update ever 2 hours at the 5 minute mark. That means the Kindle will now look for an update at 2:05, 4:05, 6:05, etc. That is a full 5 minutes after the server has pulled the weather and processed the data.

Here is the line I added: 

5  */2 * * * /mnt/us/weather/display-weather.sh
  • reboot cron 
    • type: /etc/init.d/cron restart
    • cron restart will look like this:
      • system: I cron:def:stopping crond
      • system: I cron:def:starting crond
  • the script will now run at the designated time. You can launch it manually from Kite on the home screen or wait for the interval to pass in cron and it will launch it automatically.
Notes For Setting Up Your Linux Web Server
  • You must have Python installed (version 2.7.3 will work. I have not tested the script in Python3).
  • You will need rsvg-convert or imagemagick to convert the SVG file to PNG (the Kindle cannot read SVG files).
  • You need pngcrush installed to compress the PNG file. If you use the file as provided on the Kindle Weather Display website, you will need version 1.7.22. Pngcrush should be available in your distro repository. 
NOTE: Ubuntu doesn't support the latest version and I couldn't get it to install properly from the command line so I used pngcrush 1.7.0 and modified the shell script to get the properly formatted file. Here is how I modified it:  

#!/bin/sh 
cd "$(dirname "$0")" 
python2 weather-script.py

rsvg-convert --background-color=white -o weather-script-output-new.png weather-script-output.svgpngcrush -c 0 -nofilecheck weather-script-output-new.png weather-script-output.pngcp -f weather-script-output.png /path/to/web/server/directory/weather-script-output-new.png


Raspberry Pi Special Note: 
If you're setting this up on a Raspberry Pi running Raspbian, as I have, there are a few extra notes to be aware of.
  • Used imagemagick instead of rsvg-convert (I could not find the library for rsvg-convert available on Raspbian)
  • Had to use pngcrush version 1.7.9
  • Had to ensure full paths are included in the custom cronjob because it wouldn't run the weather-script.sh file properly.
PATH=/usr/local/sbin:/usr/local/bin:/sbin:/bin:/usr/sbin:/usr/bin
m h  dom mon dow   command  
* * * * * /YOUR/WEBSERVER/FILEPATH/HERE/weather-script.sh
  • Had to set weather-script.sh file as executable (chmod 755 weather-script.sh)
    • OR add your user (default: pi) to the crontab group in /etc/group (type nano /etc/group)
  • Had to correct the Python name in the shell script from python 2 to python2.7:
#!/bin/sh

cd "$(dirname "$0")"

python2.7 weather-script.py 
convert weather-script-output.svg weather-script-output-new.png
pngcrush -c 0 nofilecheck weather-script-output-new weather-script-output.png
cp -f weather-script-output.png /path/to/web/server/directory/weather-script-output-new.png

I've enjoyed this project quite a bit and I'm already thinking about changes and modifications to the project. Some of them are:
  • Modify the display to post the current temperature OR just the low temperature after the sun sets
  • Write a script to display news and information based on RSS feeds
  • Modify the files so that they will work on the Kindle as a stand alone without the web server. Similar to the Kobo Weather Display.
I hope these notes help if you're looking to set one of these up. If you have any questions or something doesn't make sense, leave a comment or send me a tweet (@shatteredhaven) and I'll get back to you as soon as possible.

Downloads:
Kindle Weather Display Github Repository
Or if you prefer, download directly from dropbox

UPDATE 12/27/2012: I tweaked the SVG to reflect all the days of the week instead of today, tomorrow, etc. Details can be found here: Kindle Weather Display: Days For All Forecasts

Awhile back I ordered two more cheap tiny routers (TP-Link 703N) off of eBay. They're very cheap (about $21) and compact, which is appealing when you're working on smaller projects involving an Arduino or the Raspberry Pi.

The routers arrived on Friday so today I flashed OpenWRT onto one of the new router. To my surprise, the latest version of OpenWRT now comes with the web interface (LuCI), which means no installing it from the command line. That's really convenient if I ever want to configure something that way.

Once flashed, the router needed to be configured as a wireless client. That means connecting to the wifi in the house and passing that connection through to the ethernet port. Luckily, thanks to an awesome Instructables page, I already have one of these routers connected to the Snail Mail Notifier so the setup was pretty easy. I just grabbed the config files from the existing router, changed a few static IP addresses, and I was up and running in a matter of minutes. I can't tell you how much easier that was the second time around.

So we now have a Raspberry Pi on the wifi. The setup may not be as pretty as this miniature wifi dongle, but I'm happy with it.

I've wanted the Adafruit Raspberry Pi clear case for awhile so when it was back in stock earlier this week I ordered two immediately (one for each Pi we have). They arrived today which meant I had to drop everything immediately and play with them.

The cases shipped unassembled so we each put one together. They were very easy to snap together and the case holds the Pi nicely. The board shifts every so slightly in the case, but not enough to misalign any holes for the various ports on the board.
Since it's clear, that means you get to see everything inside, which is something I like. When I was younger and teaching myself how to build computers in the 90's, I really wanted a clear computer case. This clear case for the Raspberry Pi satisfies that want.

Maybe I can stick some blue LEDs in there or a water cooling system.

I'm just kidding!

Yesterday the Raspberry Pi arrived and I didn't have a chance to play with it. That means today that's all I'm going to do.
The first project I have in mind for this little credit card size computer is to turn it into a media center. I'm not saying this is a permanent thing, but it's certainly the easiest and most obvious first use. 
So I downloaded the popular Xbox Media Center (XBMC) flavor for the Raspberry Pi (called Raspbmc) and loaded it onto an SD card (which is the small black thing sticking out to the left in all of the photos).
The actual setup of the Raspberry Pi is pretty easy - just plug it in. So I hooked up everything (HDMI, ethernet, keyboard, mouse, power) and let it do it's thing.
The first step after powering the board on was to update the software through the network. After about 15 minutes or so the update and install completed and I was looking at Raspbmc.
Now, it's been several years since I've used any version of XBMC (not since playing with my original Xbox, actually) and it has only gotten better. Some awesome features right off the bat are

Networking with Windows (SMB) - Good ole Samba! This is more or less a given but it's still wonderful when the network setup goes easier than expected. Windows 7 isn't the friendliest when networking with non-windows 7 devices, but after a quick tweak I was able to stream music and video across the network. 

NOTE: I did run into a buffering issue with some video files. I'm guessing a settings tweak will resolve the issue but I haven't tried it yet. 

USB Drives - another given but wonderful nonetheless. I popped in a flash drive and it played files seamlessly. 

Airplay - This is really nice. I can mirror photos, music and videos from my iPad to my TV

Note: this is as long nothing is being streamed from the Google Youtube app. The web browser and iOS 5 YouTube app work just fine. 

So, a $35 device that does what I just use the Apple TV for? I'm cool with that. 

Add-Ons - Or what some people would now think of as "apps" or "channels." Essentially you can download things like an Al Jazeera channel, CBS news, YouTube, etc. There are a host of options in both audio and video to download, however your most popular items (Pandora, Hulu, Netflix, Amazon Video) are nowhere to be seen. There are a host of reasons for why they are not available which range from the ability of the actual Raspberry Pi (x86 processor vs ARM which is what the Raspberry Pi is) to the fact that Linux is just not as heavily supported by those developers as other environments. 

Since I have both a Roku and an Apple TV, I'm pretty well covered for streaming services. So while it would be nice if the Raspbmc had Neflix/Hulu/Amazon Video capabilties, it's not a deal breaker. But if someone was looking to use a Raspberry Pi to stream these services, they'd be out of luck. I'd recommend a cheap Roku.

PVR/DVR - admittedly this isn't something I've messed with, but the potential is now there and that's a big deal. I'm definitely going to pursue this and see what can be accomplished, just to have tried it. 
These are just a few of the features that Rasbmc has to offer. I didn't even scratch the surface while I was messing around today. I barely even used the web browser remote you can log in to and control the device with (ex if you were sitting across the room with an iPad or smart phone). 

I'll have to spend some time tweaking this and getting everything set just the way I want it.